The Ultimate Creamy Vanilla Chia Seed Pudding Recipe
Chia seed pudding has firmly established itself as a staple of modern, wholesome breakfast and snack routines. With its unique, gel-like texture and incredible ability to absorb flavors, this simple dish transforms tiny, nutrient-dense seeds into a luxurious, custard-like treat. The magic of chia pudding lies in its effortless preparation—requiring absolutely no cooking—and its versatile nature, making it the perfect canvas for creative toppings, fresh fruits, and natural sweeteners.
Achieving the ideal, clump-free consistency is all about mastering the liquid-to-seed ratio and allowing the mixture time to fully hydrate. In this guide, we will explore the culinary science behind chia seed hydration, share our signature recipe, and provide essential tips to ensure your pudding turns out perfectly thick, creamy, and smooth every single time.
The Science of Chia Seed Gelation
To understand how a liquid and a handful of dry seeds turn into a thick, spoonable pudding, we have to look at the unique properties of the chia seed (Salvia hispanica).
Highly Hydrophilic Properties
Chia seeds are intensely hydrophilic, meaning they are highly attracted to water. They have the remarkable ability to absorb up to 12 times their weight in liquid. When a chia seed comes into contact with a liquid, the soluble fiber on its outer shell expands and forms a clear, mucilaginous gel. This gel locks in the surrounding liquid, thickening it naturally without the need for heat, gelatin, or starch thickeners.
The Importance of the Initial Stir
Because chia seeds are so small and light, they have a tendency to clump together when first introduced to a liquid. If left unstirred, the seeds on the outer edge of a clump will form a gel barrier, preventing the liquid from reaching the dry seeds trapped inside. A thorough initial stir breaks up these pockets, ensuring every single seed is fully surrounded by liquid and can swell evenly.
Essential Ingredients for Creamy Chia Pudding
This foundational recipe relies on simple, clean ingredients to create a beautifully balanced, lightly sweet vanilla base.
The Base
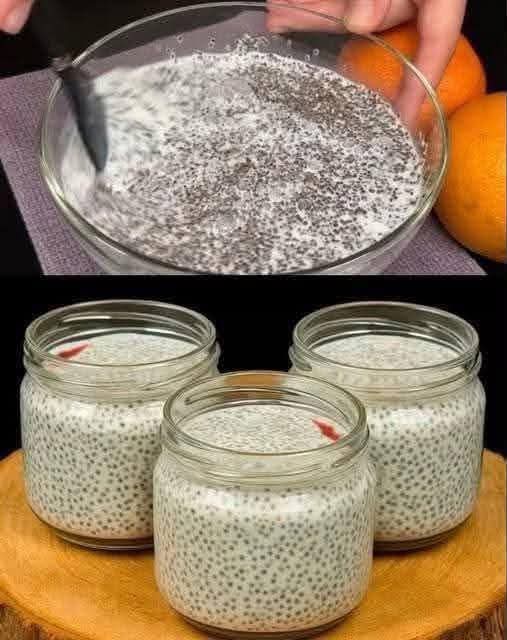
- Chia Seeds (1/4 cup / 40g): You can use either black or white chia seeds; they function identically, though black seeds provide the classic speckled appearance shown in the jars.
- Unsweetened Almond Milk or Coconut Milk (1 cup / 240ml): Provides the liquid base. Coconut milk from a carton yields a slightly richer, tropical flavor, while almond milk keeps it light and nutty.
- Pure Vanilla Extract (1/2 teaspoon): Infuses the pudding with a warm, comforting floral aroma.
The Sweetener
- Pure Maple Syrup or Raw Honey (1 to 2 tablespoons, to taste): Adds a delicate, natural sweetness that complements the neutral flavor of the seeds.
Optional Toppings & Layers
- Fresh Citrus Zest or Orange Slices: A brilliant way to add brightness, mimicking the refreshing orange tones shown in the background.
- Fresh Berries: Strawberries, raspberries, or blueberries add a beautiful pop of color and juicy tartness.
Step-by-Step Preparation and Layering
Follow these steps to mix, set, and serve your chia seed pudding to perfection.
Step 1: Combine the Ingredients
In a medium bowl or a large glass measuring cup, combine the 1/4 cup of chia seeds, 1 cup of your chosen milk, vanilla extract, and maple syrup or honey.
Step 2: The Two-Phase Stirring Method
Using a whisk or a spoon, stir the mixture vigorously for 1 full minute to ensure the seeds are well-distributed and do not settle in a clump at the bottom. Let the mixture sit undisturbed on your counter for 5 to 10 minutes. During this brief rest, the seeds will begin to absorb liquid and settle slightly. Stir the mixture vigorously once more for another minute. This second stir is the ultimate secret to preventing clumps and securing a uniform, velvety texture.
Step 3: Portion and Chill
Divide the mixture evenly into small, clean glass jars or ramekins. Cover the jars tightly with lids or plastic wrap. Place them in the refrigerator to set for at least 4 hours, or ideally overnight. This extended resting period allows the seeds to fully hydrate and the pudding to reach its maximum, spoonable thickness.
Step 4: Garnish and Serve
Once fully set, remove the jars from the refrigerator. Give each jar a quick stir. For an elegant visual presentation, tuck a slice of fresh strawberry or citrus down the inner side of the glass, or top the pudding with a vibrant layer of fresh fruit or grated orange zest just before serving.
Pro-Tips for Perfect Chia Pudding
Take your meal prep to the next level with these simple, professional kitchen tips:
Adjusting Thickness
If you prefer an ultra-thick, Greek-yogurt-like consistency, increase the chia seeds to 1/3 cup per cup of milk. If you prefer a lighter, more pourable texture, decrease the seeds to 3 tablespoons.
Achieving a Smooth Custard Texture
If you or your family members are sensitive to the gelled, poppy texture of whole chia seeds, you can easily create a smooth custard. Simply combine all the ingredients in a high-speed blender and blend on high for 1 minute until the seeds are completely pulverized. Pour the liquid into jars and let it set in the fridge as usual; it will firm up into a smooth, silky chocolate or vanilla mousse-like pudding.
Storage and Freshness Guidelines
Chia pudding is an exceptional make-ahead meal prep option because it stores beautifully.
Refrigeration
Keep the chia pudding jars tightly sealed in the refrigerator. The pudding will remain fresh, creamy, and delicious for up to 5 days. Because it keeps so well, you can easily prep a work-week’s worth of breakfast jars on Sunday evening.
Freezing
You can freeze chia seed pudding for up to 1 month. Freeze them in freezer-safe jars, leaving a little headspace at the top for expansion. Thaw the jars in the refrigerator overnight before eating, and give them a good stir before adding your fresh toppings.
Frequently Asked Questions
Can I use dairy milk?
Yes. You can use standard cow’s milk, whole milk, or any plant-based milk like oat, soy, or cashew milk. Keep in mind that richer milks will yield a denser, creamier pudding.
Why is my chia pudding still watery?
If your pudding hasn’t thickened after a few hours, it is usually because the seeds were not stirred a second time during prep (causing them to clump at the bottom without absorbing the liquid), or the chia seeds themselves are old and have lost some of their water-absorbing capacity. Simply stir in an extra tablespoon of seeds and let it sit for another hour to remedy this.
Is this recipe allergen-friendly?
Absolutely. This recipe is naturally gluten-free, dairy-free, vegan, and nut-free (when using coconut or soy milk), making it an incredibly inclusive dish for almost any dietary preference.
Conclusion
Creating a perfectly thick, creamy vanilla chia seed pudding is a simple study in patience and proper mixing. By understanding the science of how these tiny seeds absorb liquid and committing to the two-phase stirring technique, you can easily master a versatile, nutrient-dense breakfast that keeps beautifully throughout the week. Pair it with fresh seasonal fruits, enjoy it on its own, and savor a clean, refreshing, and incredibly low-maintenance culinary treat.