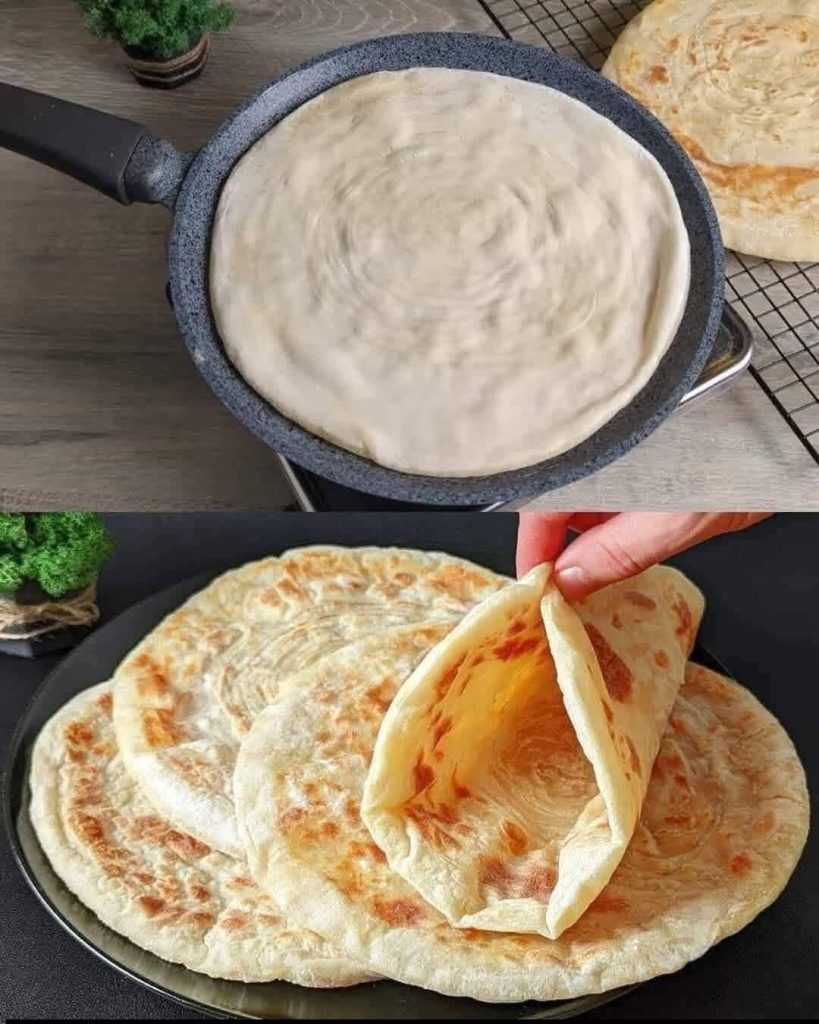
The Ultimate Authentic Msemmen Recipe Master Moroccan Flaky Flatbreads at Home
There is nothing quite like the aroma of freshly baked bread wafting through a home, and in Moroccan culinary tradition, few items carry as much comfort and heritage as Msemmen. Also known as Musamman or layered Moroccan pancakes, these square or circular flatbreads are celebrated for their unique structural composition. They boast a beautifully crisp, golden-brown exterior that gives way to dozens of paper-thin, buttery, and flaky interior layers. Typically served warm alongside soft cheese, sweet honey, or dipped into a rich mixture of melted butter and argan oil, Msemmen is a foundational staple for breakfast tables, afternoon tea gatherings, and holy celebrations across North Africa.
While the process of achieving those signature geometric laminations might look intimidating to a novice baker, it relies entirely on a few basic kitchen ingredients and proper dough-handling techniques. Once you understand how gluten development interacts with structural fat barriers, you can easily replicate this bakery-level masterpiece right on your home stovetop. This comprehensive, long-form guide will explore the cultural history and structural science behind traditional Moroccan flatbreads, provide a foolproof ingredient breakdown, and deliver a meticulous step-by-step rolling and cooking methodology to ensure your bread turns out perfectly light, airy, and flaky every single time.
The Architectural Science of Msemmen: Understanding the Flaky Layers
To consistently achieve the highly sought-after flaky interior of an authentic Msemmen, it helps to treat the dough preparation like a precise architectural process. Unlike European puff pastry, which relies on solid blocks of chilled butter to separate layers of laminated dough, Moroccan flatbread utilizes a combination of liquid fats and fine semolina grains to create distinct structural boundaries.
Gluten Development and Dough Elasticity
The foundation of a successful flatbread begins with a balanced blend of fine durum wheat semolina and all-purpose white flour. Semolina provides a high protein content, which translates to strong gluten network formation. When mixed with water and kneaded thoroughly, these proteins form long, highly elastic strands that allow the dough to be stretched until it is virtually transparent without tearing.
Proper rest periods are absolutely critical during this phase. Allowing the kneaded dough balls to rest relaxes the tightly coiled gluten strands. If you attempt to roll or stretch the dough immediately after kneading, it will continuously snap back, making it impossible to achieve the paper-thin sheets required for delicate laminations.
The Role of Fat and Semolina in Lamination
The true magic of Msemmen occurs during the folding stage. Before folding the stretched dough into its classic layered form, the surface is lubricated with a layer of vegetable oil or melted butter and then dusted lightly with fine semolina. The fat acts as a physical barrier that prevents the thin sheets of dough from fusing back together into a single solid mass during cooking.
When the dusted dough is placed onto a hot cooking surface, the moisture trapped within the dough layers quickly heats up and converts into steam. Because the layers are separated by a barrier of oil and dry semolina grains, the expanding steam forces the individual sheets upward, causing the flatbread to puff up beautifully in the pan. This steam-driven expansion creates the distinct, separate, melt-in-your-mouth layers that define authentic Moroccan bread.
Ingredients and Kitchen Tools Checklist
Creating authentic Msemmen requires humble, unrefined kitchen staples. Selecting high-quality flours and fats ensures optimal elasticity and a rich, traditional flavor profile.
The Dough Ingredients:
- 2 cups Fine Semolina (Smida Rqiga): Must be finely ground durum semolina, not coarse semolina used for couscous.
- 2 cups All-Purpose White Flour: Provides the necessary softness and workability to complement the sturdy semolina.
- 1 teaspoon Salt: Essential for enhancing the natural, nutty sweetness of the wheat grains.
- 1 teaspoon Sugar: Assists in creating a beautiful, even golden-brown caramelization on the outer crust during frying.
- ¼ teaspoon Active Dry Yeast (Optional): A tiny pinch helps soften the interior crumb slightly, though traditional recipes often rely entirely on unleavened dough dynamics.
- 1 ½ cups Warm Water: Added gradually to hydrate the flour proteins without overheating the dough.
The Lamination and Frying Elements:
- ½ cup Vegetable Oil: Used to lubricate your workspace and hands to prevent sticking during the stretching process.
- ½ cup Unsalted Butter (Melted): Provides a rich, authentic flavor barrier between the thin layers of dough.
- ¼ cup Fine Semolina: Set aside in a small bowl for dusting between the structural folds.
Recommended Equipment:
- A large, smooth work surface: A clean marble countertop, large baking sheet, or smooth wooden table is ideal.
- A heavy-bottomed frying pan or griddle: A traditional Moroccan heavy clay or cast-iron pan (Farrah) distributes heat most evenly, though a quality non-stick skillet works exceptionally well.
Step-by-Step Guide to Kneading and Shaping Authentic Msemmen
Follow this structured manual process to safely develop your dough structure, stretch it to transparent thinness, and fold it into perfect multi-layered rounds or squares.
Step 1: Kneading and Hydrating the Dough
In a large mixing bowl or a traditional wide clay shallow dish (Gsaa), combine the fine semolina, all-purpose flour, salt, sugar, and optional yeast. Create a well in the center of the dry ingredients and slowly pour in the warm water a little at a time. Use your hands to bring the flour inward, mixing continuously until a cohesive, slightly sticky dough mass begins to form.
Turn the dough out onto a clean surface and begin kneading firmly with the heels of your hands. Work the dough continuously for 10 to 12 minutes, stretching it forward and folding it back over itself. If using a stand mixer fitted with a dough hook, knead on medium-low speed for 6 to 8 minutes. The final dough should be incredibly smooth, highly elastic, and soft to the touch without sticking to your fingers.
Step 2: Portioning and the First Rest Period
Rub a thin coating of vegetable oil over your hands. Take the large dough mass and gently squeeze it between your thumb and forefinger to portion out small, smooth dough balls roughly the size of a large plum or apricot. Arrange the portioned dough balls evenly across a baking sheet that has been generously greased with vegetable oil.
Lightly brush the tops of the dough balls with oil to prevent a dry skin from forming on the surface. Cover the entire tray loosely with plastic wrap or a clean, damp kitchen towel. Allow the dough portions to rest undisturbed for 20 to 30 minutes. This pause is vital to relax the gluten network completely before stretching.
Step 3: Stretches and Creating the Translucent Sheet
Generously grease your flat work surface with vegetable oil. Take one rested dough ball and place it in the center of your oiled workspace. Using the oiled palms of your hands, begin flattening the ball out from the center outward into a wide circle.
Gently slide the palms of your hands underneath the edges of the dough and pull outward with a soft, steady motion. Continue smoothing and stretching the dough until it forms a massive, paper-thin sheet. You will know you have achieved the correct thickness when the pattern or color of your underlying countertop is completely visible through the translucent sheet of dough. Do not panic if a few small tears appear near the outer edges; these will be safely hidden inside during the folding phase.
Step 4: The Strategic Folding and Layering Process
Drizzle a tablespoon of the melted butter evenly across the surface of the translucent dough sheet, smoothing it with your hand to ensure complete coverage. Next, take a small pinch of your reserved fine semolina and dust it lightly across the buttered surface.
To fold the dough, grab the top edge of the circle and fold it down one-third of the way toward the center. Take the bottom edge and fold it up over the first fold, creating a long, narrow multi-layered rectangle. Drizzle another touch of melted butter and a tiny dusting of semolina onto this new rectangular layer. Finally, fold the left side inward one-third of the way, and fold the right side over it, creating a neat, compact square or a tight, layered coil if you prefer a circular presentation. Set this folded square aside on your oiled tray and repeat the entire process with the remaining dough balls.
The Art of Frying: Achieving the Perfect Crisp and Rise
The cooking phase requires careful heat regulation to ensure that the interior layers cook through completely before the exterior crust burns.
Step 1: Final Flattening
Before placing the bread into the pan, take your very first folded dough square (which has had a few minutes to rest and relax again). Use your fingertips to gently press down on the square, flattening it out evenly until it expands to roughly double its original size, maintaining its geometric shape. Aim for a thickness of about 1/8 of an inch.
Step 2: Managing the Griddle Heat
Heat your heavy cast-iron skillet or non-stick frying pan over medium heat for several minutes until it is thoroughly hot. Lightly grease the surface of the pan with a few drops of vegetable oil. Carefully lift the flattened Msemmen square and place it flat into the hot pan. You should immediately hear a gentle, steady sizzle.
Step 3: The Flip and Puff Method
Allow the flatbread to cook for approximately 30 to 45 seconds until you see tiny bubbles beginning to blister across the top surface and the bottom sets to a pale gold. Use a wide spatula to flip the bread over immediately.
To encourage the separation of the interior layers, turn and flip the Msemmen every 30 seconds. As it cooks, you will notice the flatbread begin to balloon and puff up dramatically in the center—this is the physical proof that your steam pocket barriers are working perfectly. Continue frying for 2 to 3 minutes in total, adjusting the heat downward if the crust darkens too quickly, until both sides sport an even distribution of deep golden-brown, crispy spots. Transfer the cooked bread to a wire rack or a cloth-lined basket to stay warm, and proceed to fry the rest of your batches.
Traditional Serving Suggestions and Pairing Ideas
Msemmen is incredibly versatile and transitions effortlessly between sweet and savory flavor profiles depending on the accompaniments you provide.
Sweet Breakfast Accompaniments
For a traditional Moroccan morning experience, serve these flaky flatbreads piping hot alongside a small bowl of warm honey mixed with melted butter. Tearing off a piece of the warm, crisp bread and dipping it into this sweet syrup allows the liquid to soak deep into the flaky interior laminations. It pairs magnificently with fresh cream cheese, goat cheese, fruit preserves, and a steaming glass of authentic Moroccan mint tea poured from a height to create a frothy crown.
Savory Lunch Variations
Alternatively, Msemmen can be adapted into a hearty lunch or dinner component. It can be stuffed prior to folding with a savory mixture of finely minced onions, garlic, warm spices like paprika and cumin, and rendered beef fat (known as Msemmen Maamer). Plain flatbreads also make a fantastic accompaniment to savory tagines, acting as the perfect edible utensil to scoop up rich, slow-cooked meat and vegetable sauces.
Storing, Freezing, and Reheating Instructions
Because this recipe yields a generous batch, knowing how to properly store and refresh your flatbreads allows you to enjoy fresh-tasting Moroccan pastries at a moment’s notice.
Refrigeration and Short-Term Storage
Allow any leftover cooked Msemmen to cool down completely to room temperature on a wire rack. Stack the cooled flatbreads on top of one another and wrap the entire bundle tightly in plastic wrap or seal them inside an airtight silicone storage bag. They can be safely stored in the refrigerator for up to 4 days.
Freezing for Long-Term Freshness
Msemmen freezes beautifully. To freeze, place a small square of parchment paper between each cooked flatbread to prevent them from freezing together into a solid block. Place the stacked bundle inside a heavy-duty freezer bag, squeeze out any excess air, and label it with the date. They will maintain excellent quality in the freezer for up to 3 months.
The Best Reheating Methods
To restore the original crispy exterior and soft, flaky interior, avoid using the microwave, as it can cause the oil-rich dough to become rubbery or tough. Instead, choose one of these superior methods:
- The Skillet Method: Place a dry non-stick frying pan over medium-low heat. Place the thawed or refrigerated Msemmen directly into the pan and heat for 1 to 2 minutes on each side until the fats liquefy and the crust crisps up beautifully.
- The Oven Method: Preheat your oven to 350^\circ\text{F} (180^\circ\text{C}). Arrange the flatbreads in a single layer on a baking sheet and bake for 5 to 7 minutes until they are thoroughly heated through and fragrant.
Conclusion
Mastering the art of authentic Moroccan Msemmen is a deeply satisfying culinary milestone that brings the rich traditions of North African hospitality straight into your home kitchen. By utilizing a simple combination of fine semolina and white flour, and respecting the essential resting periods that allow the dough to stretch to transparent thinness, you can create a spectacular bread that delights the senses with every crispy, buttery layer.
Whether you choose to serve these golden flatbreads drenched in sweet honey for a weekend family breakfast or pair them with savory cheeses for an afternoon tea gathering, the effort invested in kneading and folding will be immediately rewarded. Gather your ingredients, clear a smooth space on your kitchen counter this week, and enjoy the timeless process of creating one of the world’s most delightfully textured flatbreads entirely from scratch.