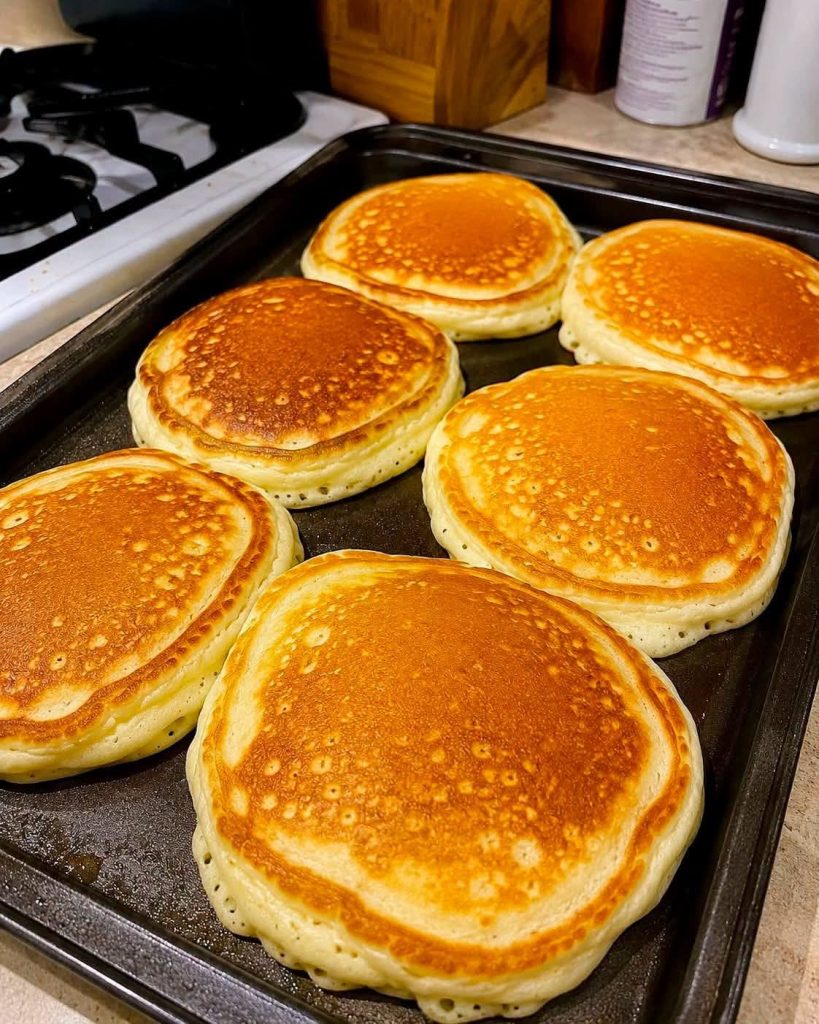
The Ultimate Fluffy Buttermilk Pancakes Recipe Thick Golden and Cloud Soft
There is nothing quite like waking up to a towering stack of golden, ultra-fluffy buttermilk pancakes on a lazy weekend morning. A truly great pancake should boast a soft, pillow-like interior, a light-as-air crumb, and a subtly crisp, buttery edge that melts seamlessly under a drizzle of warm maple syrup. While many home cooks rely on boxed mixes for convenience, making authentic, scratch-made fluffy pancakes is surprisingly easy and delivers a flavor and texture that no store-bought box can ever match.
If you have ever wondered why diner pancakes always seem so much taller, tender, and delicious than the ones made at home, the secret lies entirely in batter chemistry, moisture control, and heat management. By understanding how key leavening agents interact with buttermilk and how to handle your batter with care, you can create restaurant-quality pancakes right on your kitchen stove or griddle.
In this comprehensive, step-by-step guide, you will learn the exact science behind baking exceptionally thick and soft pancakes. We will cover the essential ingredients required, detailed preparation steps, crucial cooking techniques, creative flavor variations, storage methods, and answers to common troubleshooting questions to ensure your breakfast is a resounding success every single time.
Why This Fluffy Pancake Recipe Works
Achieving pancake perfection requires more than just mixing flour and milk together. This recipe is meticulously engineered to produce maximum height and a delicate, moist crumb without becoming heavy or doughy.
- Optimal Rise: By utilizing a double-acting combination of baking powder, baking soda, and acidic buttermilk, the batter produces carbon dioxide bubbles both when mixed and when heated, creating an exceptionally airy structure.
- Melt-in-Your-Mouth Tenderness: Melted butter mixed directly into the batter enriches the crumb and creates a velvety, non-rubbery texture.
- Balanced Flavor Profile: A touch of granulated sugar and pure vanilla extract enhances the natural creaminess of the dairy while creating a golden-brown caramelization on the griddle.
- Simple Pantry Essentials: Every ingredient needed for this recipe is likely already sitting in your pantry or refrigerator.
Secret Ingredients for Extremely Fluffy Pancakes
To create pancakes that rival your favorite brunch spot, every ingredient plays a deliberate role in texture, moisture, and rise.
The Role of Acid and Leavening Agents
The absolute cornerstone of a thick pancake is the chemical reaction between leavening agents and acids. Baking powder provides the initial lift, but baking soda requires an acid to activate. Buttermilk acts as this acid, instantly reacting with the baking soda to form tiny carbon dioxide bubbles. These trapped bubbles expand rapidly in the pan, pushing the batter upward and creating a tender, cloud-like interior.
Cold vs. Room Temperature Ingredients
Using room temperature eggs, milk, and buttermilk allows the liquids to emulsify smoothly with the melted butter. If melted butter is added to ice-cold milk, it quickly solidifies into tiny hard clumps, distributing unevenly throughout the batter. Bringing your dairy products to room temperature ensures a uniform mixture and a more consistent rise.
Flours, Fats, and Liquids
All-purpose flour provides the ideal amount of gluten structure needed to hold air bubbles without making the pancakes tough. Unsalted butter adds rich flavor and contributes to a crisp perimeter, while whole milk or buttermilk hydrates the flour proteins. A single tablespoon of sugar aids in surface browned visual appeal without making the overall pancake overly sweet.
Essential Kitchen Tools You Will Need
Before starting your pancake batter, gather the proper tools to make the cooking process seamless and stress-free:
- Large Non-Stick Griddle or Cast-Iron Skillet: A broad, flat cooking surface ensures uniform heat distribution and gives you ample room to flip without crowding.
- Whisk and Rubber Spatula: A whisk incorporates dry ingredients thoroughly, while a soft rubber spatula is ideal for gentle folding.
- Measuring Cups and Spoons: Precise measurements are vital for getting the correct batter consistency.
- Large Cookie Scoop or Measuring Cup: Using a 1/3-cup or 1/2-cup measure ensures every pancake cooks at the exact same rate and turns out uniformly sized.
- Wide Off-Set Spatula: A thin, flexible spatula easily slides under delicate pancakes without crushing their airy height.
Complete Ingredients List
- 2 1/2 cups (300g) All-Purpose Flour: Sifted to ensure lightness.
- 3 tablespoons Granulated Sugar: Adds subtle sweetness and helps with browning.
- 2 teaspoons Baking Powder: Provides essential double-acting rise.
- 1 teaspoon Baking Soda: Reacts with buttermilk for maximum airiness.
- 3/4 teaspoon Fine Sea Salt: Balances sweetness and boosts overall flavor.
- 2 cups (480ml) Whole Buttermilk: Room temperature (or whole milk mixed with 2 tablespoons lemon juice).
- 1/2 cup (120ml) Whole Milk: Adjusts the batter thickness to perfection.
- 2 Large Eggs: Room temperature, lightly beaten.
- 1/4 cup (60g) Unsalted Butter: Melted and allowed to cool slightly.
- 1 1/2 teaspoons Pure Vanilla Extract: Enhances the warm, comforting flavor.
Step-by-Step Instructions to Bake the Best Fluffy Pancakes
Following these carefully sequenced steps will yield thick, golden-brown pancakes with a tender, moist interior every single time.
Step 1: Mixing the Dry Ingredients
In a large mixing bowl, sift together the all-purpose flour, granulated sugar, baking powder, baking soda, and fine sea salt. Sifting is an important step because it removes lumps and aerates the flour, contributing to a lighter final crumb. Whisk the dry ingredients thoroughly for 30 seconds to ensure the leavening agents are evenly distributed throughout the flour mixture.
Step 2: Combining the Wet Ingredients
In a separate medium bowl or glass measuring pitcher, combine the room-temperature buttermilk, whole milk, lightly beaten eggs, melted butter, and vanilla extract. Whisk vigorously until the wet mixture is completely smooth, emulsified, and free of oil streaks.
Step 3: Gentle Folding – The Secret to Tender Pancakes
Pour the wet mixture into the bowl containing the dry ingredients. Switch from a whisk to a large rubber spatula and fold the ingredients together using broad, gentle strokes. Stop mixing as soon as no raw streaks of flour remain visible. It is crucial to remember that a perfect pancake batter should remain noticeably lumpy. Overmixing causes gluten proteins to over-develop, turning light pancakes tough, rubbery, and flat.
Step 4: Letting the Batter Rest
Allow the mixed batter to rest undisturbed at room temperature for 10 to 15 minutes. During this rest period, the flour fully hydrates, and the acidic buttermilk actively reacts with the baking soda to create thousands of micro-bubbles. You will actually see the batter expand and become slightly foamy on top. Do not stir or whisk the batter after it has rested, as stirring will pop those precious air bubbles.
Step 5: Preheating and Griddle Preparation
Place your non-stick griddle or heavy cast-iron skillet over medium-low heat. Proper temperature control is essential; if the pan is too hot, the exterior will burn before the inside cooks through. Test the surface by sprinkling a few drops of water onto the pan—if they dance and evaporate immediately, the temperature is ready. Lightly brush the surface with a tiny bit of melted butter or neutral oil, wiping off any excess with a paper towel so the pancakes cook evenly without frying unevenly.
Step 6: Cooking Low and Slow to Perfection
Gently scoop about 1/3 cup of batter per pancake onto the hot cooking surface, leaving roughly 2 inches between each pancake to allow room for flipping. Cook low and slow for 3 to 4 minutes. As they cook, you will observe large bubbles rising to the top surface and popping, leaving tiny holes, while the edges begin to look set and matte.
Step 7: Flipping and Finishing
Carefully slide a thin spatula underneath the pancake. Gently flip in one fluid motion. Avoid pressing down on the pancake with your spatula after flipping, as this squashes out trapped steam and air pockets. Cook the second side for another 2 to 3 minutes until golden brown and cooked through. Transfer cooked pancakes to a warm plate or an oven set to 200°F (90°C) to keep warm while you repeat the process with the remaining batter.
Crucial Tips to Avoid Flat, Dense Pancakes
- Never Overmix Your Batter: The golden rule of pancake making is to leave lumps in the batter. The more you stir, the more gluten develops, leading to chewy, flat pancakes.
- Check the Expiration Date on Leavening Agents: Stale baking powder or baking soda loses its ability to produce gas, resulting in heavy pancakes. Always test your baking powder in warm water to see if it fizzes before baking.
- Control Your Pan Temperature: Keep your heat consistent on medium-low. Too high heat scorches the bottom while leaving the center raw and gooey.
- Avoid Pressing Down: Resist the urge to press the top of the pancake with your spatula while cooking. Pressing flattens the internal bubble structure permanently.
Delicious Flavor Variations and Add-Ins
While classic buttermilk pancakes are delicious on their own, adding fresh ingredients can elevate them into a custom morning treat.
Classic Blueberry and Lemon Zest
Fold 1 cup of fresh or frozen blueberries and the grated zest of one organic lemon into the batter just before cooking. The bright citrus complements the sweet, juicy berries beautifully.
Chocolate Chip and Salted Caramel
Sprinkle mini semi-sweet chocolate chips onto the uncooked top side of each pancake right after pouring the batter onto the griddle. Serve topped with a drizzle of salted caramel sauce and toasted pecans.
Cinnamon Swirl
Mix 3 tablespoons of melted butter, 1/4 cup of brown sugar, and 1 teaspoon of ground cinnamon in a small piping bag. Pipe a spiral pattern onto each pancake while it cooks on the griddle for a cinnamon roll-inspired breakfast.
Savory Bacon and Cheddar Twist
Omit the vanilla extract and reduce sugar to 1 tablespoon. Fold 1/2 cup of cooked, crumbled bacon and 1/2 cup of sharp shredded cheddar cheese into the batter for a savory breakfast options.
The Best Toppings and Serving Ideas
To turn your fluffy pancakes into a complete meal, pair them with complementary toppings and side dishes:
Classic Maple Syrup and Cultured Butter
Nothing beats a warm slice of high-quality, grass-fed butter melting over a stack of hot pancakes, followed by a generous pour of 100% pure Grade A amber maple syrup.
Fresh Berries and Whipped Cream
Top your stack with a vibrant mixture of fresh sliced strawberries, raspberries, and blackberries, alongside a dollop of freshly whipped, lightly sweetened vanilla cream.
Warm Fruit Compote
Simmer sliced apples or peaches in a saucepan with a tablespoon of butter, maple syrup, and a pinch of cinnamon until soft and caramelized, then spoon over the top of your stack.
How to Store, Reheat, and Freeze Pancakes
If you make a double batch, pancakes store exceptionally well, making them ideal for quick weekday mornings.
Storing Leftovers in the Refrigerator
Allow leftover pancakes to cool completely on a wire rack to prevent moisture condensation. Place them in an airtight container or sealable zip-top bag with parchment paper between layers to prevent sticking. Store in the refrigerator for up to 4 days.
Freezing Pancakes for Quick Weekday Breakfasts
Lay cooled pancakes in a single layer on a parchment-lined baking sheet and freeze for 1 hour until firm. Transfer the frozen pancakes into a freezer-safe storage bag. Freeze for up to 3 months.
Reheating Without Losing Fluffiness
Reheat frozen or refrigerated pancakes in a toaster on a medium setting for a crisp edge and fluffy interior, or warm them on a baking sheet in a 350°F (175°C) oven for 8 to 10 minutes. Avoid microwave reheating if possible, as it can make the crumb rubbery.
Frequently Asked Questions (FAQs)
Why are my pancakes flat instead of fluffy?
Flat pancakes are usually caused by overmixing the batter, using expired baking powder or baking soda, or failing to let the batter rest before cooking. Overmixing destroys the delicate gas pockets needed for rise.
Can I make pancake batter the night before?
It is not recommended to make the entire batter overnight because baking soda and buttermilk react immediately upon contact. Over time, the gas bubbles escape, resulting in flat pancakes the next morning. However, you can measure out your dry ingredients and wet ingredients in separate containers the night before and combine them right before cooking.
Is buttermilk necessary for fluffy pancakes?
While you can make pancakes with regular whole milk, buttermilk provides the acid necessary to react with baking soda for maximum rise. It also tenderizes the gluten, creating an exceptionally soft texture. If you do not have buttermilk, combine 2 cups of milk with 2 tablespoons of fresh lemon juice or white vinegar and let sit for 5 minutes before using.
Why is my first pancake always ruined?
The first pancake often serves as a test subject because the pan temperature has not yet stabilized or the oil is unevenly distributed. Once the first pancake absorbs the excess surface oil and regulates the pan’s surface temperature, subsequent pancakes will cook much more uniformly.
Conclusion
Mastering the art of making Fluffy Buttermilk Pancakes is one of the most rewarding skills you can bring into your home kitchen. By combining the right balance of leavening agents, respecting the importance of gentle mixing, letting your batter rest, and maintaining precise pan heat, you can reliably bake stacks of golden, airy pancakes that look and taste like they came straight from an artisan brunch café. Prepare a batch this weekend, top with warm maple syrup and fresh butter, and enjoy a truly unforgettable breakfast!