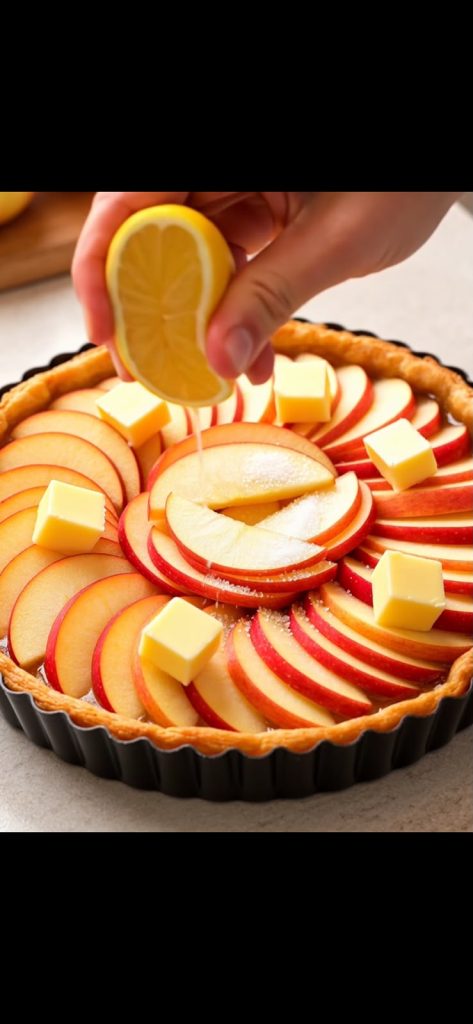
There’s something irresistible about a homemade apple tart fresh from the oven. With its golden, buttery crust, beautifully arranged apple slices, warm brown sugar, and a hint of fresh lemon, this classic dessert delivers the perfect balance of sweetness and comforting flavor.
This easy apple tart recipe looks elegant enough for a holiday gathering but is surprisingly simple to prepare at home. Thinly sliced apples are arranged in a beautiful spiral over a flaky pastry crust, then topped with butter, sugar, and lemon juice before baking until tender and lightly caramelized.
Whether you’re planning a Thanksgiving dessert, a cozy fall treat, or a sweet addition to Sunday dinner, this homemade apple tart is a recipe worth saving.
⏱️ Recipe Information
- Prep Time: 20 minutes
- Cook Time: 35–40 minutes
- Total Time: 55–60 minutes
- Servings: 8 slices
- Difficulty: Easy
- Cuisine: American-Inspired
- Cooking Method: Oven-Baked
🛒 Ingredients
For the Apple Tart
- 1 sheet frozen puff pastry, thawed (about 8–9 ounces)
- 3 medium apples, preferably Honeycrisp, Gala, or Pink Lady
- ¼ cup light brown sugar, packed
- 3 tablespoons unsalted butter, cut into small cubes
- 1 tablespoon fresh lemon juice
- 1 teaspoon vanilla extract
- ½ teaspoon ground cinnamon
- 1 tablespoon all-purpose flour
- ¼ teaspoon salt
- 1 tablespoon granulated sugar, for sprinkling
For the Optional Glossy Glaze
- 2 tablespoons apricot preserves or apple jelly
- 1 teaspoon warm water
Optional Serving Suggestions
- Vanilla ice cream
- Fresh whipped cream
- Warm caramel sauce
- A light dusting of powdered sugar
👩🍳 How to Make Easy Homemade Apple Tart
Step 1: Preheat the Oven
Preheat your oven to 375°F (190°C). Position the oven rack in the lower-middle section to help the pastry crust bake evenly.
Lightly grease a 9-inch tart pan with a removable bottom.
Step 2: Prepare the Puff Pastry
Remove the thawed puff pastry from its packaging and place it on a lightly floured surface.
Gently roll it into a circle large enough to cover the bottom and sides of your tart pan.
Avoid rolling the dough too thin, as it needs enough structure to support the apples.
Step 3: Line the Tart Pan
Carefully transfer the pastry into the prepared pan.
Press it gently against the bottom and fluted sides, making sure there are no large air pockets.
Trim any excess pastry hanging over the edges.
Place the pastry-lined pan in the refrigerator for about 10 minutes while preparing the apples.
Step 4: Wash and Slice the Apples
Wash the apples thoroughly and dry them with a clean kitchen towel.
Cut each apple into quarters and remove the core.
Using a sharp knife or mandoline slicer, cut the apples into thin slices, approximately ⅛ inch thick.
Keep the red skins on for a beautiful, colorful presentation.
Step 5: Add Fresh Lemon Juice
Place the apple slices in a large mixing bowl.
Drizzle with fresh lemon juice and gently toss until evenly coated.
The lemon juice adds a pleasant brightness and helps slow down browning while you assemble the tart.
Step 6: Prepare the Sugar Mixture
In a small bowl, combine:
- Brown sugar
- Ground cinnamon
- All-purpose flour
- Salt
Stir until everything is evenly mixed.
The flour helps absorb some of the apple juices during baking, reducing the chance of a soggy crust.
Step 7: Prepare the Pastry Base
Remove the chilled pastry from the refrigerator.
Lightly sprinkle the bottom with a small amount of the brown sugar mixture.
This creates a flavorful base beneath the apples.
Step 8: Arrange the First Layer of Apples
Starting at the outer edge of the tart pan, arrange the apple slices in overlapping rows.
Keep the curved red-skinned edges facing outward for a beautiful decorative effect.
Continue arranging the slices around the pan to create a circular pattern.
Step 9: Create the Apple Spiral
Work your way toward the center, overlapping each new row slightly over the previous one.
Use smaller apple slices to fill the middle.
The finished tart should have an attractive spiral design with very few empty spaces.
Step 10: Add the Brown Sugar Mixture
Sprinkle the remaining brown sugar mixture evenly over the arranged apples.
Try to distribute it across the entire surface so every slice develops a lightly caramelized flavor.
Step 11: Add the Butter Cubes
Cut the cold unsalted butter into small, evenly sized cubes.
Place the butter pieces across the top of the apples, spacing them around the tart.
As the tart bakes, the butter will melt into the sugar and apple juices, creating a rich, flavorful coating.
Step 12: Add Vanilla and Sugar
Drizzle the vanilla extract lightly over the apple slices.
Sprinkle the granulated sugar across the surface for a delicate caramelized finish.
Step 13: Bake the Apple Tart
Place the tart pan on a baking sheet to catch any juices that may bubble over.
Transfer it to the preheated oven and bake for 35–40 minutes, or until:
- The pastry edges are golden brown.
- The apples are tender when pierced with a knife.
- The sugar and butter have formed a bubbling glaze.
- The bottom crust is fully cooked.
If the edges brown too quickly, loosely cover them with aluminum foil during the final minutes.
Step 14: Prepare the Optional Glaze
While the tart cools slightly, combine the apricot preserves or apple jelly with warm water in a small saucepan.
Heat gently until smooth and brushable.
If necessary, strain the mixture to remove any fruit pieces.
Step 15: Brush the Tart
Remove the baked tart from the oven and let it rest for about 10–15 minutes.
Using a pastry brush, gently coat the warm apple slices with the prepared glaze.
This gives the tart a glossy, bakery-style finish.
Step 16: Cool and Serve
Allow the tart to cool until it is firm enough to slice neatly.
Carefully remove the outer ring of the tart pan.
Cut into eight slices and serve slightly warm or at room temperature.
For an extra-special dessert, add a scoop of vanilla ice cream or a spoonful of whipped cream.
⭐ Cooking Tips for the Perfect Apple Tart
- Choose the right apples. Honeycrisp, Pink Lady, and Braeburn hold their shape well during baking. Gala apples also work, although they become softer.
- Keep the pastry cold. Chilled puff pastry produces better layers and is less likely to become greasy before baking.
- Slice the apples evenly. Thin, consistent slices cook at the same rate and create a more attractive spiral.
- Avoid adding too much liquid. Excess lemon juice or other liquids can make the pastry soggy.
- Do not overload the tart. Arrange the apples snugly, but avoid stacking them into thick piles that may bake unevenly.
- Check the bottom crust. A beautifully browned top doesn’t always mean the base is finished. A metal tart pan and lower-middle oven rack can help.
- Let the tart rest before slicing. Cooling allows the juices to settle and helps the slices hold their shape.
🍏 Best Apples for Baking an Apple Tart
Choosing the right apples can make a noticeable difference in both flavor and texture.
Honeycrisp Apples: Sweet, juicy, and firm enough to retain their shape.
Pink Lady Apples: Slightly tart, with a firm texture that balances the sweetness of the brown sugar.
Braeburn Apples: Excellent for baking, offering a balanced sweet-tart flavor.
Granny Smith Apples: A good choice for anyone who prefers a more tart dessert.
For a more complex flavor, try combining two apple varieties in the same tart.
🍽️ Delicious Ways to Serve Apple Tart
This homemade apple tart is delicious on its own, but a few simple additions can make it even more enjoyable.
Serve a warm slice with vanilla bean ice cream for a classic dessert combination.
Add freshly whipped cream for a lighter finish.
Drizzle a little warm caramel sauce over each slice for extra richness.
For a holiday presentation, serve with hot coffee, cinnamon tea, or apple cider.
🧊 How to Store and Reheat Apple Tart
Room Temperature
Keep the fully cooled tart loosely covered at room temperature for up to 1 day in a cool kitchen.
Refrigerator
Store leftover slices in an airtight container in the refrigerator for up to 4 days.
Freezer
Wrap cooled slices individually and place them in a freezer-safe container.
Freeze for up to 2 months for best quality.
Reheating
Preheat the oven to 325°F (165°C).
Place the tart slices on a baking sheet and warm for 8–12 minutes, or until heated through.
An oven or air fryer generally restores the pastry’s crispness better than a microwave.
❓ Frequently Asked Questions
Can I make apple tart ahead of time?
Yes. You can prepare the pastry shell and slice the apples a few hours ahead. Keep the pastry chilled and the apple slices refrigerated with a little lemon juice. Assemble shortly before baking for the best texture.
Do I need to peel the apples?
No. Leaving the skins on gives the tart its attractive red-edged spiral design and adds a little extra texture.
Can I use homemade pie crust instead of puff pastry?
Absolutely. Homemade or store-bought pie crust works well, although the result will be more crumbly and less flaky than puff pastry. Baking times may need adjustment.
Why is my apple tart soggy?
A soggy tart can result from excessive apple juices, warm pastry, or an underbaked bottom crust. Keeping the pastry cold, using a little flour, and baking until the bottom is fully cooked can help.
Can I make this apple tart without cinnamon?
Yes. Cinnamon is optional. You can leave it out for a cleaner apple-and-butter flavor or replace it with a small pinch of nutmeg.
How do I know when the tart is done?
The pastry should be deeply golden, the apples should be tender, and the juices should be gently bubbling. Check that the bottom crust is cooked before removing it from the oven.
📊 Estimated Nutritional Information
Approximate values per serving, based on 8 slices without optional toppings. Actual values vary by ingredients and brands.
- Calories: 300 kcal
- Protein: 3 g
- Carbohydrates: 37 g
- Total Fat: 17 g
- Saturated Fat: 8 g
- Fiber: 2 g
- Sugar: 19 g
- Sodium: 160 mg
❤️ Final Thoughts
This Easy Homemade Apple Tart with Brown Sugar, Butter & Lemon is proof that a beautiful homemade dessert doesn’t need complicated ingredients or advanced baking skills.
The combination of tender apple slices, a golden flaky crust, melted butter, and warm brown sugar creates a comforting dessert that’s perfect for family gatherings, holiday celebrations, or an ordinary afternoon when you’re craving something sweet.
The delicate apple spiral makes it look impressive, while the simple preparation keeps it accessible even for beginner bakers.
Whether you enjoy it warm with vanilla ice cream or serve it at room temperature with a cup of coffee, this easy apple tart is sure to become a favorite.
🍎 Save this recipe for later, share it with someone who loves homemade desserts, and enjoy every delicious bite!