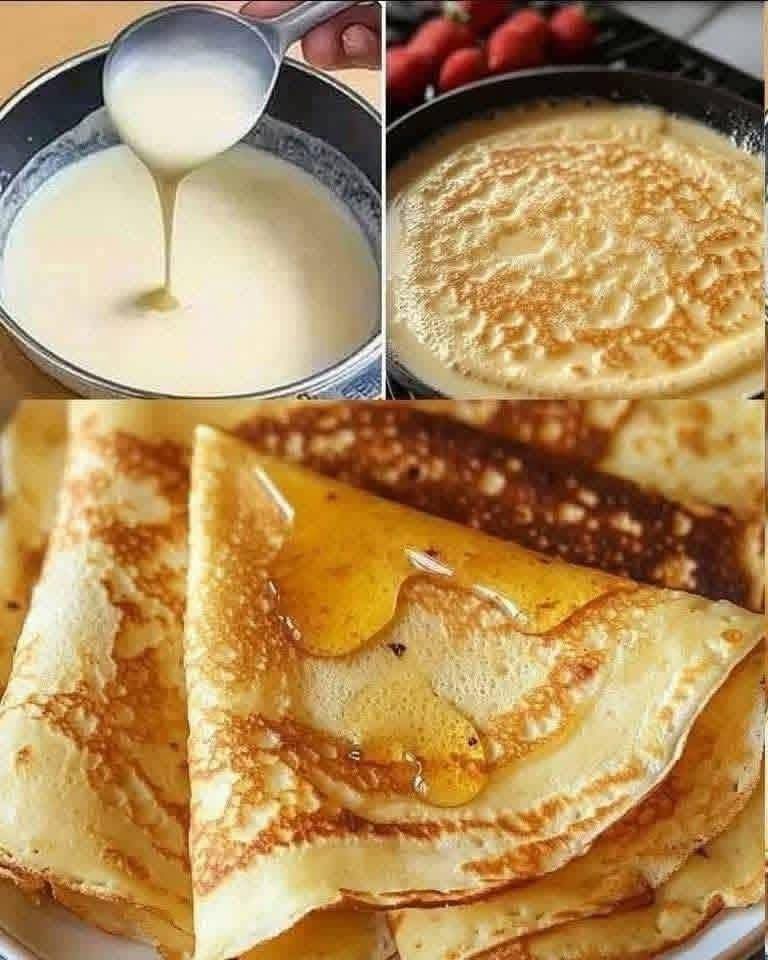
The Ultimate Thin and Lacy French Crepes Recipe Master the Art of Delicate Homemade Crepes
There is something undeniably magical about a perfectly crafted French crepe. With its paper-thin structure, beautifully lacy golden edges, and soft, tender center, it represents the pinnacle of simple yet sophisticated breakfast pastry design. Unlike thick, fluffy American pancakes, crepes offer a delicate elegance that makes them an incredibly versatile vessel for both sweet and savory culinary creations. Originating from the picturesque region of Brittany in northwestern France, these thin delicacies have captured the hearts of food lovers across the globe. Mastering the perfect crepe batter and cooking technique might seem intimidating to the home cook, but it relies entirely on understanding a few foundational principles of food science and pastry mechanics. This comprehensive guide will walk you through the entire process of creating bakery-quality crepes right in your own kitchen, ensuring a flawless result every single time you cook. From analyzing the molecular importance of batter rest to identifying the ideal skillet dynamics, you will acquire all the professional knowledge necessary to turn simple kitchen staples into an extraordinary breakfast centerpiece.
Why This Classic Crepe Formula Never Fails
Creating a crepe that is incredibly thin yet strong enough to be folded, rolled, and filled requires a precise ratio of liquid to dry ingredients. Many novice bakers struggle with crepes that turn out unpleasantly rubbery, excessively thick, or prone to tearing as soon as they hit the hot skillet surface. This time-tested recipe resolves those common issues by utilizing a perfectly balanced moisture matrix that maximizes structural integrity while preserving a melt-in-your-mouth delicacy.
The Science of Gluten Relaxation in Crepe Batter
The single most important secret to achieving a tender, delicate crepe crumb structure lies in how you treat the developed gluten network inside your flour. Whenever wheat flour is combined with liquid elements like milk and eggs and mixed, protein molecules bind together to form gluten strands. While a strong gluten network is essential for baking chewy artisan bread, it is the absolute enemy of a light, delicate French crepe. To prevent your crepes from developing a tough, leathery, or rubbery texture, the mixed batter must undergo a mandatory resting window in the refrigerator. Allowing the liquid mixture to rest undisturbed for at least thirty minutes, or ideally overnight, gives the taut gluten strands a chance to fully relax and unwind. Furthermore, this resting period allows the starch granules within the flour to completely absorb the surrounding liquid molecules, resulting in a perfectly homogenized, silky-smooth consistency that spreads evenly across a hot pan.
Striking the Perfect Balance Between Eggs and Dairy
Eggs serve as the primary structural backbone of any classic crepe recipe. They provide the necessary proteins that coagulate upon contact with heat, holding the thin layer of batter together and giving it enough flexibility to stretch without breaking. However, using too many eggs can result in a spongy, omelet-like flavor and texture that overpowers the dish. By balancing the structure of whole eggs with the rich, liquefying properties of whole milk and melted butter, you create a batter that behaves beautifully under heat. The natural fat content present in whole milk softens the crumb, while a generous addition of melted unsalted butter directly into the wet mix infuses the crepes with a rich aroma and creates a self-greasing mechanism that prevents sticking.
Comprehensive Ingredients Breakdown and Selection Guide
Because a traditional crepe batter relies on a minimal list of everyday refrigerator and pantry staples, the quality and temperature of each individual component play an immense role in the final outcome. Choosing the right ingredients ensures your batter achieves the ideal pouring consistency and cooks to a gorgeous golden hue.
The Best Flour for Delicate, Paper-Thin Pastries
For a classic sweet or standard crepe, unbleached all-purpose flour is the absolute industry standard. It contains a moderate protein percentage that offers the perfect amount of structural support without making the pastry heavy. You should avoid using high-protein bread flour, as it develops far too much gluten strength and yields a tough, overly chewy crepe. If you desire an exceptionally light, almost translucent texture, you can experiment with pastry flour or fine cake flour. For those interested in traditional French savory variations, known historically as galettes, replacing a portion of the all-purpose flour with dark buckwheat flour introduces a deeply rustic, nutty flavor profile and a beautiful speckled appearance.
Selecting Your Liquid Components: Milk and Beyond
Whole milk is highly recommended for this recipe because its natural balance of milk sugars, proteins, and fats contributes significantly to the tender texture and beautiful browning of the crepe surface. If you prefer a lighter profile, you can utilize reduced-fat milk, though the final pastry may turn out slightly less rich. For an incredibly luxurious, melt-in-your-mouth variation, some pastry chefs prefer substituting a small portion of the milk with heavy cream or half-and-half. If you find your batter feels a bit too heavy or dense after its resting period, whisking in a tablespoon or two of cold water or even sparkling club soda can lighten the mixture dramatically, introducing tiny air pockets that create an exceptionally delicate, lacy edge.
The Essential Role of High-Quality Fats and Flavorings
Melted unsalted butter is an irreplaceable component of an authentic French crepe batter. As the butter cooks inside the batter, its milk solids caramelize slightly, providing a deeply complex, nutty undertone known in French pastry circles as beurre noisette. Always ensure your melted butter has cooled down slightly to room temperature before whisking it into your liquid ingredients; adding boiling hot butter directly to cold eggs can accidentally scramble them, ruining the emulsion. To elevate the overall flavor profile of sweet crepes, a generous splash of pure vanilla extract, a fine pinch of sea salt, and a small tablespoon of granulated sugar are essential additions. The sugar assists in the caramelization process, producing those coveted leopard-like golden spots across the cooked surface.
Step-by-Step Instructions for Flawless Crepe Assembly
The process of making crepes is highly rhythmic and visual. Once you establish the correct kitchen setup and understand the physical cues of the batter, you will find yourself moving seamlessly from pouring to flipping with total confidence.
Step 1: Blending the Batter to Silky Perfection
There are two highly effective methods for assembling your crepe batter: the classic bowl-and-whisk technique or the modern high-speed blender method. The blender method is exceptionally convenient for busy mornings because it eliminates flour clumps instantly and fully homogenizes the ingredients in under sixty seconds. Simply place all your liquid components—the whole milk, room-temperature eggs, cooled melted butter, and vanilla extract—into the bottom of your blender jar first. Adding the liquids first prevents the flour from getting trapped in the corners of the blades. Pour your sifted all-purpose flour, granulated sugar, and sea salt directly on top of the liquids. Secure the lid tightly and blend on high speed for approximately twenty to thirty seconds until the mixture is completely uniform and exhibits a consistency similar to heavy whipping cream. If you notice any stubborn air bubbles floating on top, tap the blender jar firmly against your kitchen counter to release them.
Step 2: The Mandatory Refrigeration Rest Period
Pour your freshly blended crepe batter through a fine-mesh strainer directly into a large glass mixing bowl or a convenient liquid measuring pitcher with a built-in pouring spout. Straining the batter is an excellent insurance policy that catches any microscopic flour pockets or egg chalazae that managed to escape the blender blades. Cover the container tightly with plastic wrap or a secure lid and place it into the refrigerator for a minimum of thirty minutes. If you are planning ahead, allowing the batter to rest overnight for eight to twelve hours yields a spectacular depth of flavor, as the natural grain starches slowly ferment and develop a subtle, sweet complexity that enhances the overall eating experience.
Step 3: Preparing the Cooking Station and Skillet Environment
When you are ready to begin cooking, remove your crepe batter from the refrigerator and give it a very gentle stir with a ladle. You will notice that the mixture has thickened slightly as the flour particles fully hydrated during their cold rest. Bring your cooking station to life by placing a dedicated ten-inch non-stick skillet, a seasoned cast-iron crepe pan, or a traditional carbon steel pan over medium heat. Allow the pan to preheat thoroughly for three to five minutes; uneven pan temperature is the primary reason why the very first crepe of a batch often turns out poorly. Take a small stick of unsalted butter or a paper towel lightly dipped in vegetable oil and rub a incredibly thin, microscopic layer of fat across the hot cooking surface. The pan should be hot enough to make a drop of water sizzle instantly, but not so hot that the butter begins to smoke or burn.
Step 4: The Pour-and-Swirl Technique for Absolute Thinness
Hold the hot skillet firmly by its handle with your non-dominant hand and lift it completely off the heat source. Using your dominant hand, scoop up roughly one-fourth to one-third of a cup of crepe batter into a standard kitchen ladle. Pour the batter quickly and directly into the absolute center of the tilted pan. Immediately begin rotating your wrist in a fluid, circular motion, tilting the skillet in all directions so that the liquid batter cascades outward away from the center, coating the entire bottom of the pan in a perfectly uniform, paper-thin layer. This entire pouring and swirling motion should take no longer than two or three seconds; if your pan is too hot, the batter will set instantly before it has a chance to coat the perimeter, resulting in a thick, uneven pancake. Return the skillet to the medium heat source.
Step 5: Monitoring the Cook and Executing the Perfect Flip
Allow the crepe to cook undisturbed for approximately sixty to ninety seconds. Keep a close eye on the visual transformations happening in the pan. You will know the crepe is ready to be flipped when the glossy, wet surface turns completely matte, the center begins to puff up slightly, and the delicate, lacy edges turn a beautiful golden-brown color and begin to pull away cleanly from the sides of the skillet. Slide a thin, flexible silicone spatula or a traditional wooden crepe spatula gently underneath the edge of the pastry to loosen it completely. Lift the crepe confidently using your fingers or the spatula, flip it over in a swift motion, and lay it flat back into the pan. Cook the second side for a brief twenty to thirty seconds; the second side will not brown uniformly like the first, but will instead develop a beautiful, mottled appearance. Slide the finished crepe onto a warm plate and repeat the process with the remaining batter.
Expert Troubleshooting Guide for Common Crepe Mistakes
Even seasoned bakers occasionally encounter minor technical difficulties when preparing crepes due to shifts in stove heat or batter hydration. Recognizing how to read the visual cues of your pastry allows you to make instant adjustments on the fly.
Fixing Lumpy Batter or Excessive Sticking
If your crepes are persistently sticking to the bottom of the pan and tearing into pieces when you attempt to flip them, it is usually a sign of one of two issues: either your pan is lacking sufficient fat, or the pan itself is not constructed of a high-quality non-stick material. Ensure you are applying a fresh, microscopic layer of butter between every few crepes. If your batter itself feels excessively clumpy because you skipped the straining step, simply pour the mixture back into a blender and pulse it on high speed for ten seconds to emulsify the remaining flour pockets.
Adjusting Batter Thickness for Better Swirling
If you find that your batter is setting far too quickly during the swirl phase and refuses to stretch to the outer edges of the pan, your batter may be too thick due to natural variances in flour measurement. To fix this instantly, whisk a single tablespoon of milk or cold water into your remaining batter reservoir to thin out its viscosity. The ideal crepe batter should look exceptionally loose and fluid—much closer to the consistency of light cream or half-and-half than traditional, thick pancake batter.
Delicious Flavor Variations and Creative Serving Ideas
Once you have mastered the foundational crepe technique, you can explore an endless array of spectacular flavor transformations. The simple elegance of a warm crepe makes it an exceptional canvas for both minimalist toppings and decadent dessert displays.
Classic Sweet Options: Honey, Citron, and Chocolate
For a truly traditional Parisian experience, you can serve your fresh crepes warm with a simple squeeze of fresh lemon juice and a generous dusting of granulated sugar or powdered sugar, a combination known classically as Crêpes au Sucre. Another deeply comforting option is to fold the crepes into triangles and drizzle them generously with raw, golden honey as seen in artisanal farmhouses. The warm honey seeps into the delicate crevices of the lacy pastry, creating a delightfully sticky, sweet, and aromatic dessert. For a more indulgent treat, spreading a thick layer of hazelnut chocolate spread, fresh banana slices, and toasted chopped nuts inside the crepe before rolling it tightly creates an irresistible flavor profile that appeals to children and adults alike.
Transitioning to Elegant Savory Galettes
If you want to serve crepes for a sophisticated lunch or dinner centerpiece, simply omit the sugar and vanilla extract from the foundational batter recipe, adding a pinch of cracked black pepper or fresh minced herbs like chives and tarragon instead. To create the ultimate French bistro classic, known as a Crêpe Complète, flip your crepe in the pan, crack a fresh egg directly into the center, scatter shredded Gruyère cheese and diced ham around the yolk, and gently fold the four outer edges inward to create a beautiful square frame that exposes the golden yolk in the middle. Cook until the egg white sets and the cheese melts into a rich, savory filling.
Comprehensive Storage, Reheating, and Advance Prep Protocols
Crepes are an absolute dream for forward-planning meal prep because they store beautifully without losing their characteristic tenderness. Managing how you stack and protect the cooked pastries ensures they remain as fresh as the moment they left the hot skillet.
Storing a Stack in the Refrigerator Safely
Allow your cooked crepes to cool completely to room temperature on a wire cooling rack before attempting to pack them away. Stacking warm crepes directly on top of each other creates trapped steam, which makes the pastries soggy and causes them to glue together into a solid block. Once cool, create a neat stack of crepes, placing a small square of parchment paper, wax paper, or plastic wrap between each layer to act as a protective barrier. Wrap the entire stack securely in plastic wrap and place it inside an airtight container. Stored this way in the refrigerator, your crepes will stay perfectly fresh and pliable for up to three full days.
Advanced Freezing and Quick Reheating Techniques
If you want to keep a reliable stash of homemade crepes on hand for spontaneous desserts or busy weekday breakfasts, the freezer is your best friend. Take your parchment-separated stack of cooled crepes, slide them into a heavy-duty freezer-safe zip-top bag, squeeze out all the excess air, and freeze them flat for up to two months. When a craving strikes, allow the stack to thaw completely in the refrigerator overnight. To reheat individual crepes and restore their signature crisp edges, place a skillet over medium-low heat, add a tiny dot of butter, and warm each crepe for roughly fifteen seconds per side until heated through. Alternatively, you can cover the entire stack with a damp paper towel and microwave them on high for twenty to thirty seconds for a super-fast, ultra-soft texture.
Frequently Asked Questions About Making Crepes
Do I absolutely need a specialized crepe pan to succeed?
No, you do not need to purchase an expensive, specialized French crepe pan to achieve spectacular results at home. While traditional cast-iron crepe pans feature low, shallow rims that make sliding a spatula underneath the pastry incredibly easy, a standard eight-inch or ten-inch high-quality non-stick skillet works beautifully. The most important factor is ensuring that the pan has an even heat distribution and a flawless non-stick coating so that the thin batter can release cleanly without tearing.
Can I make this crepe batter entirely dairy-free or vegan?
Yes, this recipe can easily adapt to a plant-based lifestyle with a few simple ingredient substitutions. To make these crepes dairy-free, replace the whole milk with an equal amount of unsweetened oat milk, almond milk, or soy milk, and swap the melted dairy butter for melted coconut oil or your favorite vegan butter alternative. To create a completely vegan version without eggs, you can utilize a specialized commercial egg replacer or combine your alternative milk with a small amount of cornstarch to assist with the binding and thickening process, though the final texture will be slightly less elastic than traditional egg-based crepes.
Why is the first crepe of the batch always imperfect?
The phenomenon of the spoiled first crepe is so universal that it has become an accepted rule in professional kitchens worldwide. This almost always occurs because the skillet has not yet reached a perfectly stabilized, uniform temperature throughout its metal core, or because there is an excess amount of surface grease floating in the pan. As you continue to cook, the pan temperature self-regulates and the excess oil is absorbed, allowing the second and subsequent crepes to develop that gorgeous, smooth, and evenly golden leopard-spotted appearance.
Conclusion
Mastering the classic French crepe is an incredibly rewarding culinary milestone that instantly upgrades your home baking repertoire. By respecting the food science of gluten relaxation, maintaining strict control over your pan temperature, and practicing the elegant pour-and-swirl technique, you can consistently produce paper-thin, golden pastries that rival those of any high-end Parisian creperie. Whether you choose to serve them simply, drizzled with warm honey and lemon, or transformed into a rich, cheesy savory dinner, these delicate crepes offer an exceptional balance of comforting simplicity and gourmet sophistication. Gather your simple kitchen ingredients, allow your batter to rest patiently, and enjoy the beautiful, rhythmic process of crafting the ultimate homemade crepes for your family and friends.