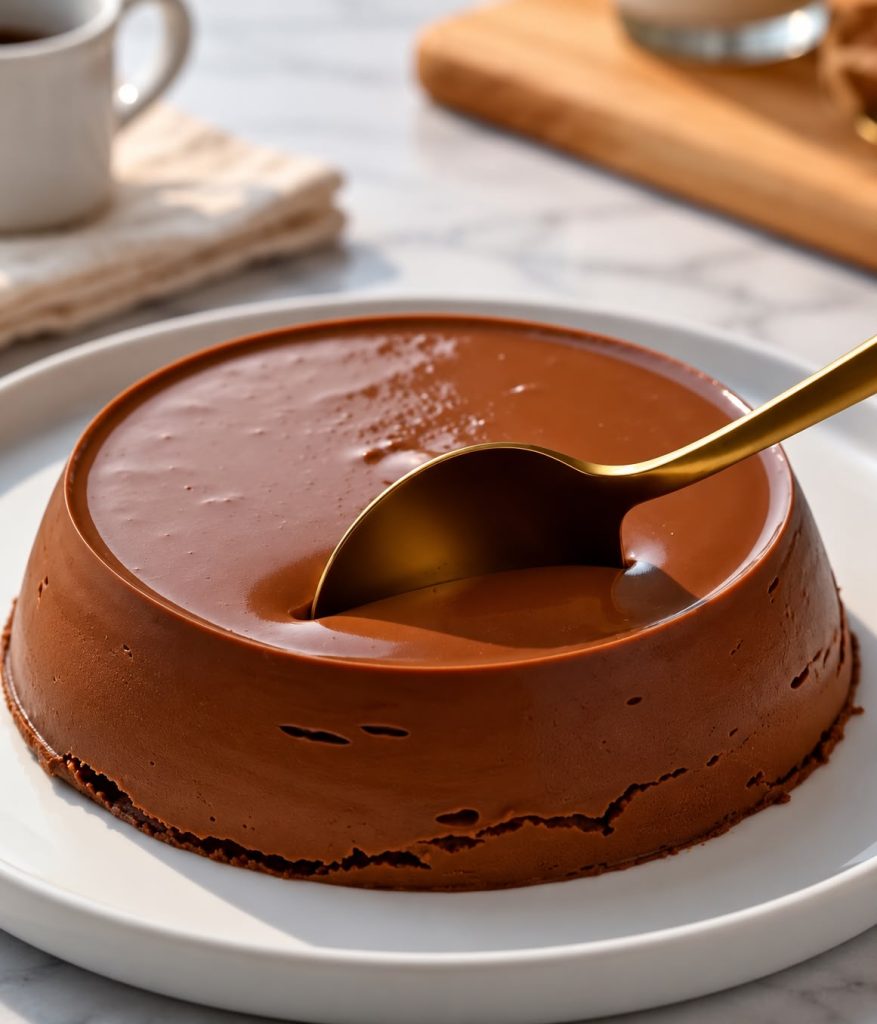
The Ultimate Silky Chocolate Dessert Made Without an Oven!
If you’re a chocolate lover, this easy no-bake chocolate mousse cake is the kind of dessert you’ll want to make again and again. With its beautiful glossy chocolate surface, smooth texture, and rich cocoa flavor, every spoonful feels like a luxurious chocolate treat.
This homemade chocolate mousse cake is wonderfully creamy, light enough to enjoy after dinner, and rich enough to satisfy even the biggest chocolate cravings.
Unlike traditional chocolate cakes that require flour, eggs, and baking, this recipe uses melted chocolate, cream, and gelatin to create a beautifully smooth, sliceable dessert.
It’s perfect for birthdays, dinner parties, holidays, family gatherings, Valentine’s Day, or whenever you want an impressive dessert without turning on the oven.
The best part? You only need a handful of ingredients and a little patience while the cake chills.
⏱️ Recipe Information
- Prep Time: 20 minutes
- Cooking Time: 5 minutes
- Chilling Time: 6 hours
- Total Time: 6 hours 25 minutes
- Servings: 8 slices
- Difficulty: Easy
- Category: Dessert
- Cooking Method: No-Bake
🛒 INGREDIENTS
For the Chocolate Mousse Cake
- 8 oz (225 g) semi-sweet chocolate, finely chopped
- 2 cups (480 ml) heavy whipping cream, divided
- 1/2 cup (120 ml) whole milk
- 1/4 cup (30 g) powdered sugar
- 2 teaspoons unflavored powdered gelatin
- 2 tablespoons cold water
- 1 teaspoon pure vanilla extract
- 1/8 teaspoon salt
Optional Chocolate Glaze
- 3 oz (85 g) semi-sweet chocolate, chopped
- 1/3 cup (80 ml) heavy cream
- 1 teaspoon unsalted butter
Optional Garnishes
- Chocolate shavings
- Fresh strawberries
- Fresh raspberries
- Cocoa powder
- Whipped cream
- Chocolate curls
👩🍳 HOW TO MAKE NO-BAKE CHOCOLATE MOUSSE CAKE
Step 1: Prepare the Cake Mold
Choose a 7-inch round silicone cake mold or a round cake pan lined with food-safe acetate.
If you’re using a regular cake pan, line the bottom with parchment paper and the sides with acetate for easier removal.
A silicone mold works especially well for creating the smooth, rounded appearance shown in the finished dessert.
Step 2: Prepare the Gelatin
Pour 2 tablespoons of cold water into a small bowl.
Sprinkle the unflavored gelatin evenly over the surface.
Allow it to sit for approximately 5 minutes until the gelatin absorbs the water and becomes soft.
This process is called blooming and helps the gelatin dissolve smoothly.
Step 3: Chop the Chocolate
Finely chop the semi-sweet chocolate into small, even pieces.
Transfer the chocolate to a heatproof mixing bowl.
Smaller pieces melt more evenly and help create a silky mousse without lumps.
Step 4: Heat the Milk and Cream
Pour the whole milk and 1/2 cup of the heavy cream into a small saucepan.
Warm over medium-low heat until the mixture begins to steam.
Do not allow it to boil.
Remove the saucepan from the heat.
Step 5: Dissolve the Gelatin
Add the bloomed gelatin to the warm milk mixture.
Whisk gently until completely dissolved.
Make sure there are no visible gelatin granules remaining.
Step 6: Melt the Chocolate
Pour the warm milk mixture over the chopped chocolate.
Allow it to sit undisturbed for 1–2 minutes.
Then stir slowly from the center outward until the chocolate melts into a smooth, glossy mixture.
Step 7: Add Vanilla and Salt
Stir in the vanilla extract and salt.
These ingredients enhance the chocolate flavor and balance the sweetness.
Step 8: Cool the Chocolate Mixture
Allow the melted chocolate mixture to cool until it is approximately room temperature but still fluid.
Stir occasionally.
Avoid adding hot chocolate to whipped cream because it can cause the mousse to lose its airy texture.
Step 9: Whip the Heavy Cream
Pour the remaining 1 1/2 cups of cold heavy whipping cream into a large mixing bowl.
Add the powdered sugar.
Using an electric mixer, whip until soft peaks form.
The whipped cream should look fluffy and hold gentle peaks without becoming stiff or grainy.
Step 10: Combine the Chocolate and Cream
Add approximately one-third of the whipped cream to the cooled chocolate mixture.
Gently stir to lighten the chocolate.
This makes it easier to combine the remaining whipped cream without losing too much air.
Step 11: Fold Until Smooth
Add the remaining whipped cream in two batches.
Using a silicone spatula, fold gently from the bottom of the bowl upward.
Continue until the mixture is evenly combined with no large white streaks.
The finished mousse should be light, creamy, and smooth.
Step 12: Pour Into the Mold
Transfer the chocolate mousse into the prepared cake mold.
Pour slowly to minimize trapped air bubbles.
Use a spatula to level the surface.
Step 13: Remove Air Bubbles
Gently tap the mold against the countertop a few times.
This helps release large air pockets and creates a smoother finished cake.
Avoid tapping excessively, which can deflate the mousse.
Step 14: Refrigerate Until Set
Cover the mold and place it in the refrigerator for at least 6 hours.
For the best texture and easiest unmolding, refrigerate overnight.
The mousse should be completely set before removing it from the mold.
Step 15: Unmold the Chocolate Cake
Carefully release the chilled cake from its silicone mold.
If necessary, place it in the freezer for 30–45 minutes to firm the surface before unmolding.
Invert the cake onto a serving plate and gently peel away the silicone.
If using a regular pan, remove the acetate carefully.
Step 16: Prepare the Optional Chocolate Glaze
Place the chopped chocolate in a heatproof bowl.
Warm the heavy cream until steaming, then pour it over the chocolate.
Let it sit for 1 minute.
Add the butter and stir until smooth and glossy.
Allow the glaze to cool until slightly thickened but still pourable.
Step 17: Add the Chocolate Glaze
For an extra-glossy finish, pour a thin layer of the cooled chocolate glaze over the chilled mousse cake.
Spread gently with an offset spatula.
Refrigerate for another 20–30 minutes until the glaze sets.
You can also leave the cake unglazed for a smooth, classic chocolate mousse appearance.
Step 18: Serve and Enjoy
Remove the cake from the refrigerator shortly before serving.
Use a sharp knife dipped in warm water and wiped dry to cut clean slices.
Serve on individual dessert plates.
For a beautiful presentation, add fresh berries, chocolate shavings, or a small spoonful of whipped cream.
Enjoy every rich, creamy, chocolate-filled bite!
⭐ WHY YOU’LL LOVE THIS CHOCOLATE MOUSSE CAKE
- No Oven Required
This dessert is completely no-bake, making it ideal for warm days or whenever you don’t want to use the oven.
- Rich Chocolate Flavor
Real semi-sweet chocolate gives the mousse a deep, satisfying chocolate taste.
- Smooth and Creamy Texture
Whipped cream creates a light mousse, while a small amount of gelatin helps the cake hold its beautiful shape.
- Perfect for Special Occasions
The elegant appearance makes this dessert suitable for birthdays, holidays, and dinner parties.
- Make-Ahead Friendly
You can prepare the cake the day before serving, making entertaining much easier.
💡 COOKING TIPS FOR PERFECT RESULTS
- Use High-Quality Chocolate
Choose chocolate that you enjoy eating on its own. The chocolate is the main flavor of this dessert, so quality matters.
- Don’t Overheat the Chocolate
Overheated chocolate can become grainy or separate. Use gentle heat and stir until smooth.
- Cool the Chocolate Before Folding
The chocolate mixture should be cool enough not to melt the whipped cream, but still fluid enough to fold easily.
- Whip Cream to Soft Peaks
Overwhipped cream can make the mousse heavy or grainy. Stop mixing when soft peaks form.
- Bloom the Gelatin Properly
Always sprinkle gelatin over cold water before dissolving it in warm liquid.
This prevents unpleasant lumps.
- Allow Enough Chilling Time
A minimum of 6 hours is recommended, but overnight chilling produces the most reliable results.
- Use a Silicone Mold
A silicone mold helps create a smooth, professional-looking finish without damaging the cake during removal.
- Keep the Dessert Cold
Chocolate mousse softens as it warms. Refrigerate until shortly before serving.
🍓 DELICIOUS RECIPE VARIATIONS
Dark Chocolate Mousse Cake
Replace the semi-sweet chocolate with dark chocolate containing approximately 60–70% cocoa for a more intense flavor.
Milk Chocolate Mousse Cake
Use milk chocolate for a sweeter, milder dessert. The mousse may be softer, depending on the chocolate used.
Chocolate Raspberry Mousse Cake
Add a thin layer of raspberry compote beneath the mousse or serve with fresh raspberries.
The tart berries complement the rich chocolate beautifully.
Chocolate Coffee Mousse Cake
Dissolve 1 teaspoon of instant espresso powder in the warm milk mixture.
Coffee enhances the chocolate flavor without necessarily making the dessert taste strongly of coffee.
Chocolate Orange Mousse Cake
Add 1 teaspoon of finely grated orange zest for a bright citrus flavor.
Chocolate Cookie Crust
For extra texture, press a mixture of 1 cup finely crushed chocolate cookies and 3 tablespoons melted butter into the bottom of a springform pan before adding the mousse.
Chill the crust first so it stays firm.
🧊 HOW TO STORE CHOCOLATE MOUSSE CAKE
Refrigerator
Store the chocolate mousse cake in an airtight container in the refrigerator for up to 3 days.
Keep it covered to prevent it from absorbing odors from other foods.
Freezer
For longer storage, freeze individual slices in freezer-safe containers for up to 1 month.
Thaw overnight in the refrigerator before serving.
The texture may change slightly after freezing and thawing.
Room Temperature
Because this dessert contains dairy, it should not be left at room temperature for more than 2 hours, or 1 hour in very hot conditions.
❓ FREQUENTLY ASKED QUESTIONS
Can I make chocolate mousse cake without an oven?
Yes! This recipe requires no baking. The mousse sets in the refrigerator with the help of gelatin.
Can I make this cake without gelatin?
You can make a softer chocolate mousse without gelatin, but it may not hold the same freestanding cake shape. A different stabilized mousse recipe would be needed.
Why is my chocolate mousse cake not setting?
The gelatin may not have dissolved completely, the measurements may be incorrect, or the cake may need additional refrigeration.
Allow it to chill overnight before deciding whether it has set properly.
Can I prepare this dessert the night before?
Absolutely! Preparing it the night before is one of the best ways to achieve a firm, creamy texture.
What type of chocolate works best?
Semi-sweet chocolate provides a balanced flavor. Dark chocolate creates a richer dessert, while milk chocolate makes it sweeter.
How do I get a smooth surface?
Use a clean silicone mold, pour the mousse carefully, and gently tap out large air bubbles before chilling.
Can I add a biscuit base?
Yes. A chocolate cookie crust adds a delicious crunchy contrast to the smooth mousse.
Is chocolate mousse cake the same as chocolate cheesecake?
No. Chocolate mousse cake typically gets its light texture from whipped cream, while chocolate cheesecake uses cream cheese for a denser, tangier filling.
📊 NUTRITIONAL INFORMATION
Estimated per serving (1 slice, based on 8 servings, without optional glaze):
- Calories: Approximately 430 kcal
- Protein: 5 g
- Carbohydrates: 29 g
- Total Fat: 34 g
- Saturated Fat: 21 g
- Fiber: 2 g
- Sugar: 24 g
- Sodium: 75 mg
Nutrition values are approximate and may vary depending on the chocolate, cream, and portion sizes used.
❤️ FINAL THOUGHTS
This Easy No-Bake Chocolate Mousse Cake is a dream dessert for anyone who loves rich chocolate and smooth, creamy textures.
With its elegant appearance, silky mousse filling, and delicious chocolate flavor, it looks like something from a professional bakery but can be made at home with simple ingredients.
Whether you’re preparing a romantic dessert, a birthday surprise, or a special weekend treat, this homemade chocolate mousse cake is guaranteed to impress chocolate lovers.
The combination of fluffy whipped cream, melted chocolate, and a beautifully smooth finish makes every slice irresistible.
📌 Save this Easy No-Bake Chocolate Mousse Cake recipe for later, share it with someone who loves chocolate, and enjoy this rich, creamy homemade dessert! 🍫❤️