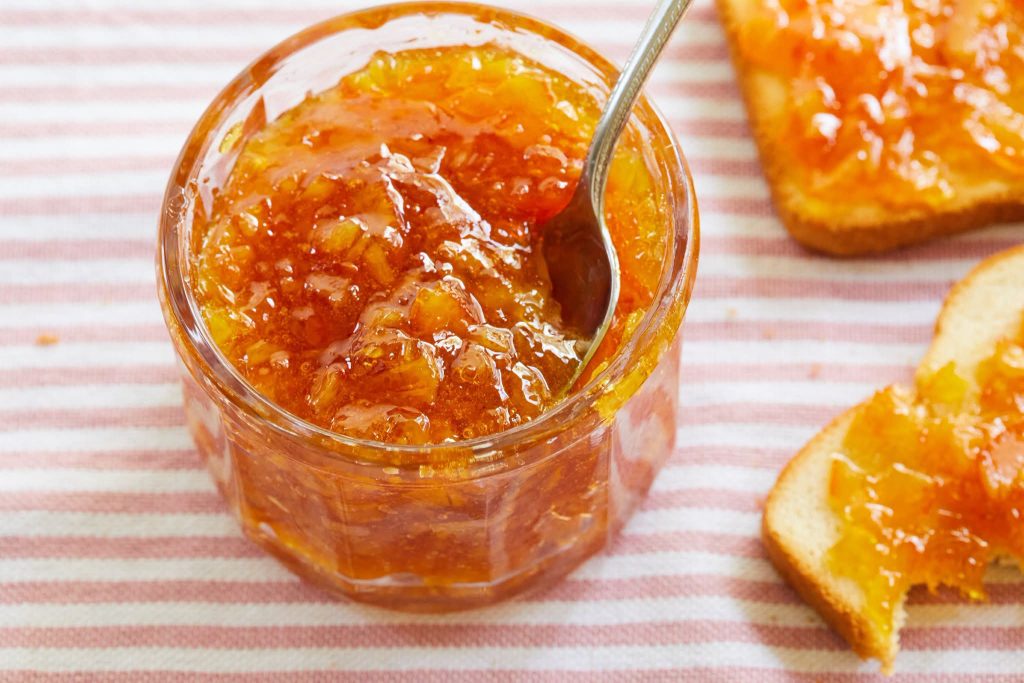
Homemade Orange Marmalade Recipe The Ultimate Guide to Perfect Citrus Jam
There is something deeply satisfying about making your own preserves from scratch. The bright, tangy, and sweet profile of a classic homemade orange marmalade is unmatched by anything you can buy in a grocery store. Unlike regular fruit jams, marmalade celebrates the entire citrus fruit, utilizing the juice, pulp, and the essential oil-rich peel to create a complex spread with a signature bittersweet bite. Whether you want to elevate your morning toast, glaze a roasted meat dish, or gift a beautiful jar of sunshine to a friend, mastering the art of orange marmalade is a rewarding culinary project.
Creating the perfect batch requires a balance of the right citrus fruits, sugar, and technique. In this comprehensive guide, we will walk you through everything you need to know to make an exceptional orange marmalade. You will learn about the science behind natural pectin, the step-by-step cooking process, and expert tips to ensure your marmalade sets perfectly every single time.
Why Make Your Own Orange Marmalade?
Making marmalade at home allows you to control the quality of the ingredients and customize the texture to your exact preference. Commercial brands often over-sweeten their products or use artificial thickeners, which can mask the true vibrancy of the citrus. When you cook it yourself, you can adjust the thickness of the peel shreds, balance the sweetness, and even introduce complementary flavors like vanilla, ginger, or a splash of bourbon.
Beyond the superior flavor, canning your own preserves is a wonderful way to capture the essence of citrus season. It fills your kitchen with an incredible, bright aroma and leaves you with a pantry stocked with delicious, artisanal spreads that keep well for months.
Understanding the Secret to a Perfect Set: Pectin
One of the most common concerns for beginners is getting the marmalade to set properly without adding commercial liquid or powdered pectin. Fortunately, citrus fruits are naturally loaded with pectin, which is the structural substance that helps jams and jellies gel.
The highest concentration of natural pectin is found in the white pith of the orange peel, the membranes, and the seeds. Instead of discarding these parts, traditional marmalade recipes utilize them during the initial boiling phase. By simmering the seeds and pith in a cheesecloth bag along with the fruit, you extract the maximum amount of natural pectin into the liquid. Combined with sugar and the natural acidity of the juice, this creates a firm, glossy set naturally.
Ingredients You Will Need
To make a traditional, high-quality orange marmalade, you only need a few simple ingredients. Because you will be using the entire fruit, including the outer skin, it is highly recommended to use organic, unwaxed citrus whenever possible to avoid pesticides or artificial coatings.
- Seville Oranges or Sweet Oranges: Seville oranges are the traditional choice for British-style marmalades due to their high acid and pectin content and distinctly bitter flavor. If they are out of season or difficult to find, a combination of sweet oranges (such as Navel or Valencia) and fresh lemons works beautifully to replicate that perfect sweet-tart balance.
- Fresh Lemons: Adding fresh lemon juice is crucial if you are using sweet oranges. The lemons supply the necessary acidity required to activate the pectin and balance the sugar.
- Granulated Sugar: Sugar does more than sweeten the recipe; it acts as a preservative and binds with the water and pectin to create the gel structure. Regular white granulated sugar or cane sugar works best for a clear, bright color.
- Filtered Water: Water is used to simmer and soften the tough citrus peels before the sugar is added.
Essential Kitchen Tools for Canning
Having the right equipment on hand makes the process smoother, safer, and much more enjoyable. Gather these tools before you begin cooking:
- A Large, Heavy-Bottomed Pot: A wide Dutch oven, stainless steel pot, or copper preserving pan is ideal. The wide surface area allows moisture to evaporate efficiently, while a heavy bottom prevents the high-sugar mixture from scorching.
- A Sharp Knife and Cutting Board: You will need a reliable chef’s knife or a mandoline slicer to cut the citrus peels into clean, uniform strips.
- Cheesecloth and Kitchen Twine: This is used to create a small pouch for the seeds and excess pith, making it easy to extract the pectin and remove it later.
- A Candy or Jelly Thermometer: While not strictly mandatory, a thermometer takes the guesswork out of finding the setting point.
- Sterilized Glass Jars and Lids: Standard canning jars with fresh lids are required for storing your finished product safely.
- A Ladle and Jar Funnel: These tools help you transfer the hot marmalade cleanly into the jars without creating a sticky mess.
Step-by-Step Instructions for Homemade Orange Marmalade
1. Preparing the Fruit and Extracting Pectin
Begin by thoroughly washing your oranges and lemons in warm water, scrubbing the skins gently to remove any dirt. Using a sharp knife, cut the top and bottom off each orange. Slice the fruit in half, squeeze out the fresh juice into your large cooking pot, and catch all the seeds.
Instead of throwing the seeds away, place them into a small piece of cheesecloth. Scrape out the interior white membranes and any remaining pith from the orange halves, adding those to the cheesecloth as well. Tie the pouch tightly with kitchen twine and set it aside. This pouch will be your natural source of pectin.
2. Slicing the Peel
The texture of your marmalade depends entirely on how you slice the peel. Take the remaining orange skins and slice them into your desired thickness. For a delicate, elegant texture, slice them into paper-thin slivers. If you prefer a rustic, chunky style, cut them into thicker ribbons. Add the sliced peels, the fresh citrus juice, the water, and the cheesecloth pectin pouch directly into your heavy-bottomed pot.
3. Simmering to Soften the Peel
Bring the mixture to a boil over medium-high heat. Once boiling, reduce the heat to low, cover the pot loosely, and let it simmer gently for about 40 to 50 minutes. You want the peels to become completely translucent and tender enough to break easily between your fingers. Skipping this step or adding sugar too early will harden the peels, leaving you with an unpleasant, chewy texture.
4. Adding the Sugar and Reaching the Setting Point
Carefully remove the cheesecloth pouch from the pot, pressing it firmly between two spoons to squeeze out every drop of sticky, pectin-rich liquid back into the pot. Discard the pouch. Turn the heat down to low and pour in the granulated sugar. Stir continuously until the sugar completely dissolves into the warm liquid.
Once the sugar is fully dissolved, turn the heat up to medium-high to bring the mixture to a rapid, rolling boil. Do not cover the pot during this stage. Let the mixture boil vigorously, stirring occasionally to prevent the bottom from burning. As the water evaporates, the liquid will transform from a thin syrup into a thick, glossy, amber-colored preserve.
How to Test If Your Marmalade is Ready
If you are using a candy thermometer, your marmalade is generally ready when it reaches a consistent temperature of 220°F (104°C) at sea level. However, the most reliable and traditional way to check the consistency is the wrinkle test.
The Wrinkle Test Method
Before you start cooking, place two or three small ceramic saucers in your freezer. When you think the marmalade has thickened sufficiently, remove the pot from the heat source. Place a small spoonful of the hot liquid onto one of the chilled saucers and return it to the freezer for exactly one minute.
Take the saucer out and gently push the edge of the jam puddle with your fingertip. If the surface wrinkles up and the mixture holds its shape rather than running back to fill the gap, your marmalade has reached its setting point. If it remains completely liquid and runny, return the pot to the heat, boil it for another 5 minutes, and test it again with a fresh cold saucer.
Sterilizing and Filling the Jars
Proper sterilization is key to ensuring your homemade preserves remain shelf-stable for a long time. While your marmalade is finishing its boil, wash your glass canning jars and lids thoroughly in hot, soapy water. Place the damp jars on a baking sheet and heat them in an oven preheated to 250°F (120°C) for roughly 15 minutes, or run them through a hot cycle in your dishwasher.
Once the marmalade passes the wrinkle test, remove the pot from the heat completely. Let it sit undisturbed for about 5 to 10 minutes before jarring. This brief cooling period allows the liquid to thicken slightly, ensuring that the heavy pieces of peel remain evenly suspended throughout the jar rather than floating directly to the top.
Carefully ladle the hot marmalade into your warm, sterilized jars using a jar funnel, leaving about a quarter-inch of headspace at the top. Wipe the rims of the glass jars with a clean, damp cloth to remove any sticky residue that might prevent a proper seal. Place the lids on top and screw the bands on until they are fingertip tight.
Storage, Shelf Life, and Serving Ideas
If you plan to store your marmalade in the pantry for long-term use, process the filled jars in a boiling water bath for 10 minutes. Once processed, remove them carefully and let them sit undisturbed on a countertop for 24 hours. You will hear a satisfying click or pop sound as the jars cool, indicating a successful vacuum seal. Properly sealed and stored in a cool, dark place, your homemade marmalade will keep beautifully for up to a year. Once a jar is opened, store it in the refrigerator and consume it within a few months.
If you prefer to skip the water bath canning process, you can simply allow the jars to cool down to room temperature and store them directly in your refrigerator, where they will remain fresh for several weeks.
Creative Ways to Enjoy Your Marmalade
While slathering this bright orange spread over warm, buttered sourdough or toasted English muffins is an absolute classic, its uses extend far beyond breakfast. The complex sweet and bitter profile makes it an incredibly versatile ingredient in both sweet and savory cooking.
- In Baking: Use it as a vibrant filling between layers of a sponge cake, swirl it into vanilla muffin batter, or brush it over a freshly baked fruit tart to give it a professional, glossy sheen.
- Savory Glazes: Melt the marmalade down with a touch of soy sauce, Dijon mustard, and minced garlic to create a spectacular glaze for roasted chicken, pork tenderloin, or baked ham.
- Cheese Pairings: Add a dollop of orange marmalade to your next charcuterie board. It pairs exquisitely with sharp, aged cheddar, creamy goat cheese, or rich, buttery brie.
- Beverages: Stir a teaspoon of the syrup into hot black tea, or use it as a unique citrus sweetener for craft cocktails like a classic Gin and Tonic or a Bourbon Old Fashioned.
Conclusion
Mastering homemade orange marmalade is an incredibly fulfilling process that rewards your patience with jars of vibrant, deeply flavorful citrus preserve. By understanding the natural role of pectin and taking the time to properly soften the peels, you can create an artisanal product that far surpasses anything available on supermarket shelves. Keep a few jars in your pantry for a taste of sunshine during the colder months, or share them as thoughtful, handcrafted gifts for friends and family.